![[인프런 워밍업 클럽 3기 풀스택 ] 2주차 발자국](https://cdn.inflearn.com/public/files/blogs/0ca5d96f-140a-4263-81b6-d065e924a552/thumbnail.png)
[인프런 워밍업 클럽 3기 풀스택 ] 2주차 발자국
목차
Dropbox Clone Project
Drag & Drop 할 영역 설정 및 서버에 파일 전송
supabase의 Storage에 첨부파일 업로드
첨부파일 검색, 삭제
2주차 미션
파일의 마지막 수정(업로드) 시간을 표시하기
파일명을 UUID로 변경하여 업로드하기
Dropbox Clone Project
1. Drag & Drop 할 영역 설정
Drag & Drop 라이브러리 설치
npm i --save react-dropzonefile-dragdropzone.tsx 파일
div: 파일을 받는 영역 태그
input: 파일 정보를 받는 태그
isDragActive: 어떤 파일을 드래그 앤 드롭할 때 영역에 무엇을 보여줄지 정할 수 있게 해주는 값
ex) 드래그를 했다면? 파일을 여기에 드롭: 아니라면 파일을 드래그 앤 드롭을 해라 라는 문구 출력
formData에 파일 이름과 파일 정보를 담아서 전송
multiple을 true로 작성하여 여러 파일을 받을 수 있게 한다
export default function FileDragDropZone() {
  const uploadImageMutation = useMutation({
    mutationFn: uploadFile,
    onSuccess: () => {
      queryClient.invalidateQueries({
        queryKey: ["images"], // images로 시작하는 것들 전부 리셋
      });
    },
  });

  const onDrop = useCallback(async (acceptedFiles) => {
   // 10개 이하의 파일만 업로드함
    if (acceptedFiles.length > 0 && acceptedFiles.length <= 10) {
      const formData = new FormData();

      acceptedFiles.forEach((file) => {
        formData.append(file.name, file);
      });

      await uploadImageMutation.mutate(formData);
    }
  }, []);
  const { getRootProps, getInputProps, isDragActive } = useDropzone({
    onDrop,
    multiple: true,
  });

  return (
    <div
      {...getRootProps()}
      className="w-full border-4 border-dotted border-blue-700 flex flex-col items-center justify-center py-20 cursor-pointer"
    >
      <input {...getInputProps()} />
      {uploadImageMutation.isPending ? (
        <Spinner />
      ) : isDragActive ? (
        <p>파일을 놓아주세요.</p>
      ) : (
        <p>파일을 여기에 끌어다 놓거나 클릭하여 업로드 하세요.</p>
      )}
    </div>
  );
}
2. supabase의 Storage에 첨부파일 업로드
.env 파일에 Storage 명 추가
NEXT_PUBLIC_STORAGE_BUCKET=miniboxroot/actions 폴더 생성
storageActions.ts 파일에 storage에 업로드할 함수 작성
export async function uploadFile(formData: FormData) {
  const files = Array.from(formData.entries()).map(
    ([name, file]) => file as File
  );
// all(): 여러 파일을 한 번에 업로드 진행하기 위해 사용
  const results = await Promise.all(
    files.map((file) => {
      supabase.storage
        .from(process.env.NEXT_PUBLIC_STORAGE_BUCKET)
        .upload(file.name, file, { upsert: true });
    })
  );
  return results;
3. 첨부파일 검색, 삭제
storageActions.ts 파일에 파일 검색, 파일 삭제 함수 추가
export async function searchFiles(search: string = "") {
  const supabase = await createServerSupabaseClient();
  const { data, error } = await supabase.storage
    .from(process.env.NEXT_PUBLIC_STORAGE_BUCKET)
    .list(null, { search }); // path, options, parameters
  handleError(error);
  return data;
}

export async function deleteFile(fileName: string) {
  const supabase = await createServerSupabaseClient();
  const { data, error } = await supabase.storage
    .from(process.env.NEXT_PUBLIC_STORAGE_BUCKET)
    .remove([fileName]);

  handleError(error);

  return data;
}
2주차 미션
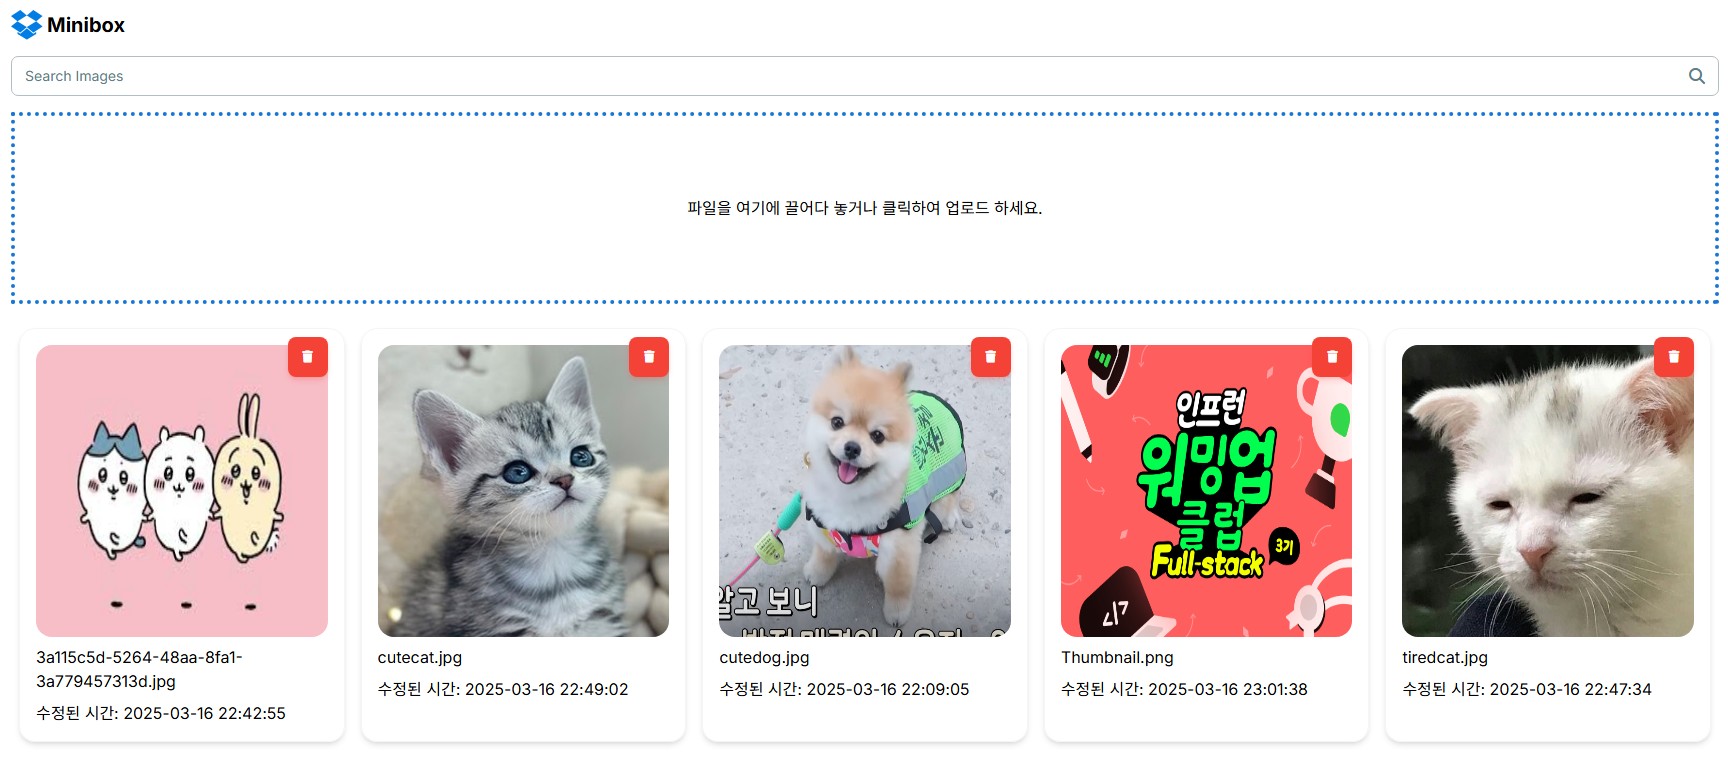
[미션 완성 이미지]

[파일의 마지막 수정(업로드) 시간을 표시하기]
dropbox-image.tsx
storage에서 받아오는 정보 내에 마지막 수정 시간을 담고 있는 updated_at을 가져와 표시
formData로 날짜와 시간의 가독성을 높여줌
const formData = (dateString: string) => {
    return format(new Date(dateString), "yyyy-MM-dd HH:mm:ss");
  };

return (
    ...
    {/* FileName */}
    <div>{image.name}</div>
    <div>수정된 시간: {formData(image.updated_at)}</div>
    ...
)
[파일명을 UUID로 변경하여 업로드하기]
- 한글명 파일이 업로드 되지 않아 uuid로 파일 명을 변경하여 업로드 해보았음
- 업로드는 잘 되나 같은 파일을 업로드 하여도 파일 명이 변경되어 업로드 되기 때문에 새로 업로드 되어 업로드 시간이 변경되지 않아 적용하지는 않음
uuid 설치하기
npm install uuidstorageActions.ts
ext 변수에 첨부 파일의 확장자 추출
fileName 변수에 uuid+.확장자를 합쳐 파일명 생성
const results = await Promise.all(
    files.map((file) => {
      const ext = file.name.split(".").pop(); // 확장자 추출
      const fileName = `${uuidv4()}.${ext}`; // UUID 기반 파일명 생성
      supabase.storage
        .from(process.env.NEXT_PUBLIC_STORAGE_BUCKET)
        .upload(fileName, file, { upsert: true });
    })
);댓글을 작성해보세요.
