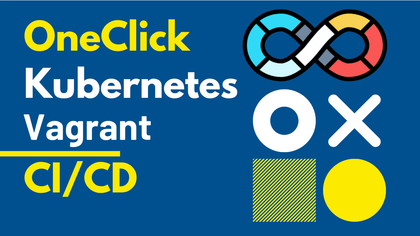
바로쓰는 CI/CD on K8S
₩51,700
초급 / Kubernetes, Jenkins, argocd, vagrant, Docker
5.0
(1)
실리콘 밸리의 최전선에서 직접 경험한 실무 사례를 바탕으로 한 DevOps 강의를 소개합니다. 이 강의는 이론에만 머무르지 않고, 실제 엔지니어링 현장에서 바로 적용할 수 있는 K8S환경에서 CI/CD 관련된 도구를 다룹니다.
초급
Kubernetes, Jenkins, argocd
실리콘밸리에서 10년 이상 활동하고 있는 DevOps 시니어 소프트웨어 엔지니어입니다.
클라우드 관리, 자동화, 보안, 네트워크 등 다양한 프로젝트 경험을 보유하고 있습니다.
바로쓰는 CI/CD on K8S
₩51,700
초급 / Kubernetes, Jenkins, argocd, vagrant, Docker
5.0
(1)
실리콘 밸리의 최전선에서 직접 경험한 실무 사례를 바탕으로 한 DevOps 강의를 소개합니다. 이 강의는 이론에만 머무르지 않고, 실제 엔지니어링 현장에서 바로 적용할 수 있는 K8S환경에서 CI/CD 관련된 도구를 다룹니다.
초급
Kubernetes, Jenkins, argocd
바로쓰는 CI/CD on EKS
₩64,900
초급 / AWS, Kubernetes, Jenkins, Docker
5.0
(3)
실리콘 밸리의 최전선에서 직접 경험한 실무 사례를 바탕으로 한 DevOps 강의를 소개합니다. 이 강의는 이론에만 머무르지 않고, 실제 엔지니어링 현장에서 바로 적용할 수 있는 EKS환경에서 CI/CD 관련된 도구를 다룹니다.
초급
AWS, Kubernetes, Jenkins
실전 대비! DevOps인터뷰 완전 정복 - 기본편
₩35,200
초급 / 기술면접, Terraform, Kubernetes, Ansible, CI/CD
5.0
(4)
DevOps 인터뷰 준비: Git, Docker, CI/CD, Terraform, Ansible, Kubernetes, Monitoring 관련 인터뷰 준비를 마스터하세요.
초급
기술면접, Terraform, Kubernetes
실전 대비! DevOps 인터뷰 완벽 정복 - 고급편
₩38,500
초급 / devops, AWS, Terraform, Kubernetes, Jenkins
4.3
(6)
DevOps 인터뷰 준비: 클라우드, CI/CD, 코드형 인프라, 모니터링, 리눅스, 도커, 쿠버네티스 인터뷰 준비를 마스터하세요.
초급
devops, AWS, Terraform
모르면 승진 안되는 시스템 디자인
₩132,000
중급이상 / 소프트웨어 설계, 소프트웨어 공학, 시스템 디자인
4.6
(32)
실리콘 밸리 엔지니어 아저씨들이 가르치는 소프트웨어 시스템 디자인 강의에서는 대규모 시스템의 설계 원칙과 아키텍처 패턴을 학습하며, 안정적이고 확장 가능한 소프트웨어 솔루션을 구축하는 방법을 배웁니다. 또한, 실무 사례를 통해 성능 최적화 및 장애 대응 전략을 다룹니다.
중급이상
소프트웨어 설계, 소프트웨어 공학, 시스템 디자인
질문&답변
초기 one click 설치 자체가 실패하는데 확인부탁드립니다.
이 문제를 확인하기 위해 재설치를 진행해봤습니다.bash bootstrap.sh 명령어로 실행했을 때, EKS는 정상적으로 생성되었습니다.혹시 cluster_name 값을 변경하신 적 있으신가요?resources/.auto.tfvars 파일에서 다음과 같이 설정되어 있어야 합니다: cluster_name = "topzone-eks" (예시) 참고로 저는 기존의 topzone-k8s를 topzone-eks로 변경한 후 설치를 진행했고, 그 결과 해당 에러는 발생하지 않았습니다. 혹시 모를 상황을 대비해서, 현재 설치된 자원을 완전히 삭제한 후 다시 설치해보시길 권장드립니다.강의에서 언급드린 것처럼, 설치된 자원을 삭제하는 과정이 복잡할 수 있으며, 자원이 완전히 삭제되지 않으면 이후 재설치 과정에서 오류가 발생할 수 있습니다. 삭제 방법은 /README.md 파일의 ## Destroy 항목을 참고해주세요.
질문&답변
windows 환경에서 초기 설정 sh 실행
안녕하세요.질문에 대한 답변을 드립니다. 우선 shell(.sh) 파일을 실행하려면 리눅스 쉘 환경이 필요합니다.일반적으로 알려진 방법은 아래의 두가지 입니다. Windows에서 .sh 파일(셸 스크립트 파일)을 실행하려면 리눅스 셸 환경이 필요합니다. 기본적으로 Windows는 .sh 파일을 직접 실행할 수 없기 때문에, 다음 중 하나의 환경을 구성해야 합니다:✅ 1. Windows Subsystem for Linux (WSL) 설치가장 자연스럽고 권장되는 방법입니다.설정 방법:PowerShell을 관리자 권한으로 실행하고 다음 명령 입력:wsl --installWindows 11이나 최신 Windows 10이면 이 한 줄로 설치됩니다.설치 후 PC 재시작Ubuntu 같은 배포판을 선택하고 초기 설정.sh 파일을 실행:bash bootstrap.sh ✅ 2. Git Bash 사용 (가벼운 셸 환경)Git for Windows를 설치하면 함께 제공됩니다.설정 방법:Git for Windows 설치설치 후 Git Bash 실행.sh 파일이 있는 폴더로 이동:bash bootstrap.sh감사합니다.
질문&답변
명령어 파일이 있으면 좋을 것 같아요.
강의 자료에도 있지만, 대부분의 명령어는 아래의 git 코드의 readme 또는 shell 에서 찾으실 수 있습니다.tz-k8s-vagrantvagrant 및 설치 shellgit clone https://github.com/topzone8713/tz-k8s-vagranttz-demo-app (vagrant branch)git clone https://github.com/topzone8713/tz-demo-apptz-argocd-repoArgoCD Repogit clone https://github.com/topzone8713/tz-argocd-repo감사합니다.
2024. 11. 18.
1
EKS 1.29 -> 1.30 issuer_url error Fix
EKS 1.29 -> 1.30 로 테라폼으로 업그레이드 할 때 아래의 에러가 날 수 있습니다.$ terraform plan -var-file=.auto.tfvars ╷ │ Error: Missing required argument │ │ with module.eks.aws_eks_identity_provider_config.this["sts"], │ on .terraform/modules/eks/main.tf line 588, in resource "aws_eks_identity_provider_config" "this": │ 588: issuer_url = try(each.value.issuer_url, local.idpc_issuer_url) │ │ The argument "oidc.0.issuer_url" is required, but no definition was found. output "oidc_issuer_url" { value = module.eks.cluster_oidc_issuer_url이런 에러가 나는 1.29 버전의 테라폼 스크립트는 다음과 같습니다.module "eks" { source = "terraform-aws-modules/eks/aws" version = "~> 20.0" cluster_name = local.name cluster_version = "1.30" # => 30 cluster_endpoint_private_access = true cluster_endpoint_public_access = true create_cloudwatch_log_group = false ~~ cluster_identity_providers = { sts = { client_id = "sts.amazonaws.com" } } 즉, cluster_identity_providers 에 issuer_url이 누락되었다는 에러로 아래와 같이 값을 얻어낼 수 있습니다.$ aws eks describe-cluster --name topzone-k8s --region ap-northeast-2 --query "cluster.identity.oidc.issuer" --output text그 값을 테라폼에 적용한 후에 cluster_identity_providers = { sts = { client_id = "sts.amazonaws.com" issuer_url = "https://oidc.eks.ap-northeast-2.amazonaws.com/id/1907C9BCD0E80760BB636DAC6383031A" } } 다시 apply하면 EKS과 node_group 버전 뿐 아니라 Add-on 도 자동으로 아래와 같이 업그레이드 됩니다.terraform apply -var-file=.auto.tfvars -auto-approve ~ cluster_addons = { ~ coredns = { ~ addon_version = "v1.11.1-eksbuild.4" -> "v1.11.1-eksbuild.8" id = "topzone-k8s:coredns" tags = { application = "topzone-k8s" environment = "prod" } # (14 unchanged attributes hidden) } ~ kube-proxy = { ~ addon_version = "v1.29.0-eksbuild.1" -> "v1.30.0-eksbuild.3" id = "topzone-k8s:kube-proxy" tags = { application = "topzone-k8s" environment = "prod" } # (14 unchanged attributes hidden) } ~ vpc-cni = { ~ addon_version = "v1.16.0-eksbuild.1" -> "v1.18.1-eksbuild.3" id = "topzone-k8s:vpc-cni" tags = { application = "topzone-k8s" environment = "prod" } # (14 unchanged attributes hidden) }
2024. 11. 09.
2
쿠버네티스(K8S)에서 OpenTelemetry 설정하기
OpenTelemetry를 Kubernetes 클러스터에 설정하여 애플리케이션의 트레이스를 수집하고, Grafana Tempo로 전송해 시각화합니다.Cert-Manager 설치 (선택 사항)Kubernetes OpenTelemetry Operator 설치kubectl create ns opentelemetry-operator helm repo add open-telemetry https://open-telemetry.github.io/opentelemetry-helm-charts helm repo update #helm show values open-telemetry/opentelemetry-operator > opentelemetry-operator_values.yaml helm upgrade --debug --install --reuse-values \ opentelemetry-operator open-telemetry/opentelemetry-operator \ --namespace opentelemetry-operator \ --create-namespace \ --values "opentelemetry-operator_values.yaml" \ --version 0.29.2 \ --set admissionWebhooks.certManager.enabled=false \ --set admissionWebhooks.certManager.autoGenerateCert=true Kubernetes Tempo 설치kubectl create ns tempo #helm show values grafana/tempo-distributed > tempo_values.yaml helm upgrade --debug --install \ tempo grafana/tempo-distributed \ --create-namespace \ --namespace tempo \ --values "tempo_values.yaml" \ --version 1.4.2 Grafana 데이터 소스에 Tempo 추가kubectl get svc tempo-distributor-discovery -n tempo NAME TYPE CLUSTER-IP EXTERNAL-IP PORT(S) AGE tempo-distributor-discovery ClusterIP None 3100/TCP,4318/TCP,4317/TCP,55680/TCP 9m9s Grafana URL 예시: http://tempo-query-frontend-discovery.tempo:3100OpenTelemetry Collector 설치#helm show values open-telemetry/opentelemetry-collector > opentelemetry-collector_values.yaml helm upgrade --debug --install --reuse-values \ opentelemetry-collector open-telemetry/opentelemetry-collector \ --values "opentelemetry-collector_values.yaml" \ --namespace opentelemetry-operator 자동 계측 설정kubectl create ns nlp kubectl delete -f opentelemetry-instrumentation.yaml -n nlp kubectl apply -f opentelemetry-instrumentation.yaml -n nlp kubectl get instrumentations.opentelemetry.io -n nlp 마스터 노드가 워커 노드의 9443/tcp 포트에 접근할 수 있도록 방화벽 규칙을 추가하거나 기존 규칙을 수정하여 9443/tcp 접근을 허용해야 합니다.테스트 애플리케이션 설정kubectl apply -f test2.yaml -n nlp kubectl logs -l app.kubernetes.io/name=opentelemetry-operator \ --container manager -n opentelemetry-operator --follow 각 네임스페이스에 계측 설치 필요:PROJECTS=(devops devops-dev common common-dev) for item in "${PROJECTS[@]}"; do echo "===================== ${item}" kubectl delete -f opentelemetry-instrumentation.yaml -n ${item} kubectl apply -f opentelemetry-instrumentation.yaml -n ${item} done Ingress-Nginx 생성kubectl -n opentelemetry-operator apply -f collector-ingress.yaml curl을 이용한 테스트curl -i http://collector.opentelemetry-operator.topzone.io/v1/traces -X POST -H "Content-Type: application/json" -d @span.json 자동 계측 (Node.js)패키지 추가test-application/package.json"dependencies": { "@opentelemetry/api": "^1.7.0", "@opentelemetry/auto-instrumentations-node": "^0.40.0" } 사이드카 추가apiVersion: apps/v1 kind: Deployment metadata: name: test-application spec: selector: matchLabels: app: test-application template: metadata: annotations: instrumentation.opentelemetry.io/inject-nodejs: "true" 수동 계측 (Python)from opentelemetry.sdk.resources import SERVICE_NAME, Resource from opentelemetry import trace from opentelemetry.exporter.otlp.proto.http.trace_exporter import OTLPSpanExporter from opentelemetry.sdk.trace import TracerProvider from opentelemetry.sdk.trace.export import BatchSpanProcessor resource = Resource(attributes={ SERVICE_NAME: "tz-devops-admin" }) traceProvider = TracerProvider(resource=resource) processor = BatchSpanProcessor(OTLPSpanExporter(endpoint="http://collector.opentelemetry-operator.topzone.io/v1/traces")) traceProvider.add_span_processor(processor) trace.set_tracer_provider(traceProvider) def do_GET(self, httpd): tracer = trace.get_tracer("do_GET") with tracer.start_as_current_span("ri_cal") as span: span.set_attribute("printed_string", "done") with tracer.start_as_current_span("ri_usage") as span: span.set_attribute("printed_string", "done") 참고: https://github.com/doohee323/tz-eks-main/tree/eks-main-t/tz-local/resource/opentelemetry원문)https://www.linkedin.com/pulse/opentelemetry-k8s-dewey-hong-jdnzc/?trackingId=UGXm85DYTRaCjn%2F0wugyVw%3D%3D
2024. 11. 09.
2
쿠버네티스(EKS)에서 Sentry 배포하기
Datadog과 New Relic과 같은 툴은 종합적인 모니터링을 제공하지만 비용이 많이 들 수 있습니다. Bugsnag은 Sentry와 유사하지만, Sentry는 특히 클라이언트 오류 추적과 성능 모니터링에서 뛰어나며, 저비용의 오류 추적과 알림을 위해 Kubernetes에 배포하기에 적합합니다.K8s에서 효율적인 모니터링Loki: 서버 로그를 관리하고 Grafana로 쉽게 시각화할 수 있습니다.Prometheus: 애플리케이션과 서버 성능 모니터링에 사용됩니다.Grafana: Prometheus와 Loki 메트릭을 통합하여 비용을 절감하면서 CloudWatch 로깅을 최소화합니다.Sentry: 저비용의 클라이언트 측 오류 모니터링을 위해 사용하며, Slack 또는 이메일로 알림을 전송합니다.이 구성은 비싼 상용 도구를 사용하지 않고도 K8s에서 효율적인 인프라 및 애플리케이션 모니터링을 제공합니다.이 가이드에서는 Amazon EFS를 사용한 지속 가능한 저장소 설정, Sentry 구성, 그리고 Express.js 애플리케이션과의 통합을 포함한 Sentry를 Kubernetes(EKS)에 배포하고 테스트하는 과정을 설명합니다. 1. Sentry Helm 리포지토리 추가먼저, Sentry Helm 리포지토리를 추가하고 Sentry 네임스페이스를 생성합니다.bash코드 복사helm repo add sentry https://sentry-kubernetes.github.io/charts helm repo update kubectl create ns sentry 2. EFS 스토리지 클래스 생성Sentry의 저장소를 설정하기 위해 Amazon EFS를 사용할 것입니다.2.1 EFS CSI 드라이버 설치먼저, Amazon EFS와 상호 작용할 수 있도록 EFS CSI 드라이버를 설치합니다.helm repo add aws-efs-csi-driver https://kubernetes-sigs.github.io/aws-efs-csi-driver/ helm repo update helm upgrade -i aws-efs-csi-driver aws-efs-csi-driver/aws-efs-csi-driver \ --namespace kube-system \ --set image.repository=602401143452.dkr.ecr.ap-northeast-2.amazonaws.com/eks/aws-efs-csi-driver \ --set controller.serviceAccount.create=true \ --set controller.serviceAccount.name=efs-csi-controller-sa 2.2 PersistentVolume 및 PersistentVolumeClaim 생성파일 시스템 ID 가져오기file_system_id=$(aws efs describe-file-systems --query "FileSystems[*].FileSystemId" --output text) echo $file_system_idPersistentVolume 정의 및 적용efs-pv를 사용하여 EFS와 연결되는 PersistentVolume(PV)을 생성합니다.specs/pv.yaml:apiVersion: v1 kind: PersistentVolume metadata: name: efs-pv spec: capacity: storage: 100Gi volumeMode: Filesystem accessModes: - ReadWriteMany persistentVolumeReclaimPolicy: Retain storageClassName: efs-sc csi: driver: efs.csi.aws.com volumeHandle: $file_system_id PV 적용:kubectl apply -f specs/pv.yamlPersistentVolumeClaim 정의 및 적용efs-claim을 사용하여 PV를 사용할 PersistentVolumeClaim(PVC)을 생성합니다.claim.yaml:apiVersion: v1 kind: PersistentVolumeClaim metadata: name: efs-claim spec: accessModes: - ReadWriteMany storageClassName: efs-sc resources: requests: storage: 5Gi PVC 적용:kubectl apply -f claim.yaml -n sentry 2.3 StorageClass 정의 및 적용Amazon EFS를 위한 StorageClass를 정의합니다.specs/storageclass.yaml:kind: StorageClass apiVersion: storage.k8s.io/v1 metadata: name: efs-sc provisioner: efs.csi.aws.com StorageClass 적용:kubectl apply -f specs/storageclass.yaml 3. Sentry 배포를 위한 값 업데이트Sentry의 기본 설정 값을 가져와서 배포에 맞게 업데이트합니다.기본 values.yaml 가져오기helm show values sentry/sentry --version 25.10.0 > values.yaml values.yaml에 필요한 구성 업데이트:user: create: true email: admin@sentry.local password: XXXXX system: url: "https://sentry.topzone.io/" adminEmail: "devops@topzone.io" mail: backend: smtp useTls: true useSsl: false username: "XXXXX" password: "XXXXX" port: 587 host: "email-smtp.ap-northeast-2.amazonaws.com" from: "devops@topzone.io" symbolicator: enabled: true api: usedeployment: true persistence: enabled: true accessModes: ["ReadWriteMany"] storageClassName: "efs-sc" google: clientId: "XXXXX" clientSecret: "XXXXX" slack: clientId: XXXXX clientSecret: XXXXX signingSecret: XXXXX nginx: enabled: false ingress: enabled: true regexPathStyle: nginx ingressClassName: nginx alb: httpRedirect: false annotations: kubernetes.io/ingress.class: nginx nginx.ingress.kubernetes.io/use-regex: "true" cert-manager.io/cluster-issuer: "letsencrypt-prod" nginx.ingress.kubernetes.io/proxy-body-size: 200m nginx.ingress.kubernetes.io/proxy-buffers-number: "16" nginx.ingress.kubernetes.io/proxy-buffer-size: "32k" hostname: sentry.topzone.io tls: - hosts: - sentry.topzone.io secretName: sentry-ingress-tls filestore: backend: filesystem filesystem: path: /var/lib/sentry/files persistence: enabled: true storageClass: "efs-sc" accessMode: ReadWriteMany existingClaim: "sentry-data-pvc" persistentWorkers: true 4. Sentry 설치업데이트된 설정으로 Sentry를 Helm을 사용하여 설치합니다.helm upgrade --debug -install sentry sentry/sentry \ -n sentry -f values.yaml --wait --timeout=1000s --version 25.10.0 5. 설치 후: 새 프로젝트 설정Sentry를 설치한 후 애플리케이션 모니터링을 시작할 새로운 프로젝트를 생성합니다.5.1 Sentry에서 프로젝트 생성방문: https://sentry.topzone.io/organizations/topzone/projects/5.2 Express SDK 구성Express 애플리케이션에 Sentry를 통합하여 오류를 캡처합니다.npm install --save @sentry/node Sentry 설정 (src/instrument.js):const Sentry = require("@sentry/node"); Sentry.init({ dsn: "https://XXXXX@sentry.topzone.io/6", tracesSampleRate: 1.0, }); Express 애플리케이션에 오류 처리 추가 (src/app.js):require("./instrument.js"); const Sentry = require("@sentry/node"); const express = require("express"); const app = express(); Sentry.setupExpressErrorHandler(app); app.use(function onError(err, req, res, next) { res.statusCode = 500; res.end(res.sentry + "\n"); }); app.get("/", function rootHandler(req, res) { res.end("Hello world!"); }); app.get("/error", function rootHandler(req, res) { // 오류가 Sentry에 캡처됩니다. Sentry.captureException('Something went wrong!'); }); app.listen(3000); 6. 소스 맵 업로드더 나은 JavaScript 오류 가시성을 위해 Sentry에 소스 맵을 업로드합니다.curl -sL https://sentry.io/get-cli/ | sh sentry-cli --url https://sentry.topzone.io/ login npx @sentry/wizard@latest -i sourcemaps 7. Sentry 테스트마지막으로, Sentry가 애플리케이션의 오류를 캡처하는지 확인합니다.이 구성으로 EKS에서 Sentry를 사용하여 애플리케이션을 효과적으로 모니터링하고 디버깅할 수 있습니다.원문)https://www.linkedin.com/pulse/deploying-testing-sentry-kubernetes-eks-doohee-hong-em9sc/?trackingId=KrSiOLrQR6eWgOwtiEcyRg%3D%3D