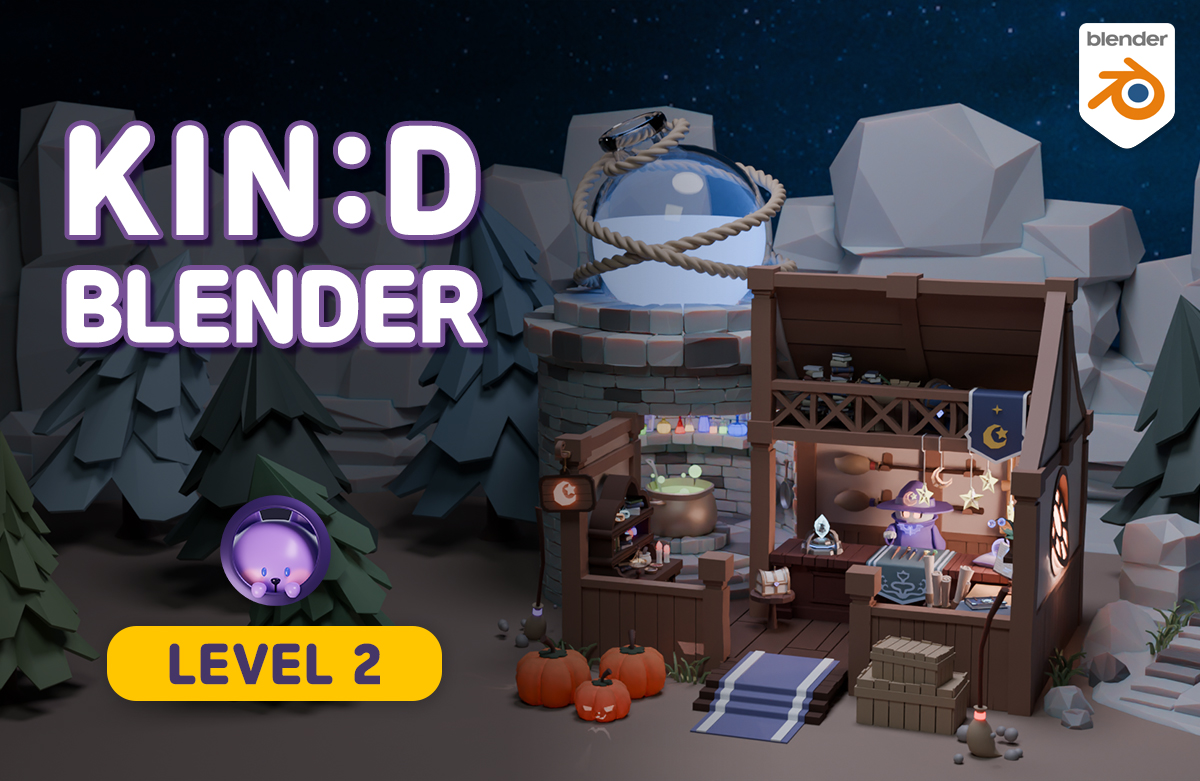
Try the experience of completing a voluminous piece. It will give you a sense of accomplishment and will greatly help your Blender skills. Let's make it together, one by one! :)
What you will learn!
Modeling method utilizing various functions
Expressing materials using nodes
The overall process of creating a work
By modeling various objects, we will apply, expand, and extend the basics of Blender that we have learned so far.
This is a practical example lecture for making the experience your own.
It is also a process of learning and practicing new features that you have not yet learned.
The shop run by a wizard was designed to feel like a scene from a game.
It's time to learn and use various functions through low-poly style magic shop modeling.
As I practiced modeling enough and became more familiar with it, I prepared a process to think about how to make it on my own.
Through this process, you will gain experience in approaching modeling in your own style and acquiring know-how.
The wood and stone floors have a vintage feel. How can I express this texture?
Add a sense of space by building a wall. The planks next to the wall are made from the wooden floor that was already made.
The windows used Boolean functions. The stairs also used objects that were previously created.
How can we create a circular stone wall? Let's use two modifiers to express a stone wall.
If you texturize it later, it will become this transparent. How do you express a crystal-like material?
The picture on the rug was drawn with a mouse. I used the Annotate and Gstretch functions, so let's learn them together.
Scale, Extrude, Inset Faces, Loop Cut, Bevel. You know all these functions, right? You can make it with those.
The cushion was made using the Cloth function in Physics. If you know this function, you can make it in less than a minute.
I'll show you how to make a broom with a natural feel, wooden shape and a curved brush-like tip!
I hung a moon and star pendant on the second floor railing and made a logo with it and decorated it on the flag. How do you make a moon and star that look so plump?
Open books and letters written to match the curves of the book, shining letters and shining patterns! It's not hard to make if you know the know-how!
The patterns on the corners of the book may seem difficult to put in, but they aren't! Let's practice making them together.
Since this is a magic shop, you can also make flower pots with mysterious shapes that don't seem to exist in this world.
Let's learn how to create flame shapes and translucent materials.
I used the Sculpt function to create the old and dented shape of the pot. It's not a difficult function, so let's get started.
Are you ready to make potions of various shapes? Be sure to check out these tips for making various similar objects.
The mushrooms were drawn directly using the Texture Paint feature. It's not difficult, as you just need to draw a round circle with the mouse.
Are you curious about how to make a rope? We'll use Screw and Curve Modifier. And we'll also learn how to use curves a little more easily.
Books are an item that goes well with any background, and the more you have of them, the richer the background becomes. Let's make books of various shapes together.
This is a reagent bottle that goes really well with crystal material. The soft glow makes the space stand out more.
When it comes to antique items, a pair of scales is one of the first things that comes to mind. A metal plate with a shining star on it? Wow~
This place has various materials and tools that fit the concept of a space for making reagents. Isn't it cute?
Expressing the shape of a rolled paper, expressing a round bucket with a wooden board. It's easy to make if you know how, but it's hard to think of the method, right? Let's make it together!
How do you make the metal decorations on the treasure chest frame? The top of the treasure chest is gently curved, right? There are still many functions to learn!
Carpets that fit the curve of the stairs! When the floor is bare, carpets or rugs are the best.
Do you see the antique pattern on the corner that was made to perfectly capture the classic feel? That was made with a bevel. Isn't it amazing?
How to make a pumpkin! If you don't know the know-how, it's actually quite difficult to make. From the crookedly cut eyes, nose, and mouth to the material that allows light to pass through! Every detail was meticulously made.
A broom that cleans... Could this be the beginning of a robot vacuum cleaner? Please take a look and note how it differs in shape and material from the broom hanging on the wall.
The second floor is a space that is not very visible, so I arranged it with items that I had already made. It is also necessary to adjust the intensity of the space!
I think there's nothing better than a living character to bring a space to life. Characters are a little more difficult than other things because they're organic, but this also takes practice.
Rocks that are great for backgrounds are fun to carve, like soap sculptures.
How to make a spiky tree with a low-poly feel? And giving it a slightly curved feel gives it another vibe.
It's a very simple method of making stones and grass, but the effect is not insignificant. The difference between having stones and grass and not having them is enormous.
I think the portal door in the center will be the most interesting and difficult. I made it using nodes, and since I'm explaining each step, it won't be difficult!
All of the example photos above have been textured, but in this tutorial we will cover texturing in Section 8.
Learn how to add various materials and have fun coloring.
You will gain confidence in modeling.
You will be able to think about and create the modeling method you want to create.
Even if you watch other tutorials, you won't feel vague.
You will be able to follow along if you understand the principles and methods.
Friendly Blender helps you build a foundation based on reasons and principles and gain the power to think for yourself . If you don't know the principles, you won't know why your modeling is wrong or where to fix it. Also, when you want to make your own work, you won't know how to make it. You need to develop the ability to think for yourself about how to make it . I'll help you really enjoy Blender. Let's study Blender together!
We will teach you the knowledge and principles needed to create 3D works, how to view the screen, basic settings, shortcuts, etc. We will finish the introductory course by going through the process of creating an object using basic shapes.
Recommended for those who are just starting out with Blender or want to learn it properly from the beginning!
We will teach you the most essential functions and principles when creating a basic work using Blender. We will finish the basic course by using the props made with the functions learned in between in the final work, a donut shop.
Recommended for those who experience situations like 'Why isn't this working?' when making something with a blender!
Through the process of creating a magic shop from scratch, you will learn basic functions and new functions that you did not encounter in LV.1, and apply modeling. You can also learn tips and know-how when modeling through practice.
Recommended for those who want to make the basics of Blender completely 'theirs'!
Q. Why should I learn Blender?
Blender is a program with a lot of features and it's free! It's a good program to try out when you're wondering if you're good at 3D. It's also great for learning as a hobby and for those who want to create their own animations or videos.
If you are learning for employment, it may be a good idea to learn a program that is widely used in that field. It is true that Blender is still relatively less well-known in Korea and is not used much by companies. It is natural because there are programs that were used before. However, companies that use Blender are gradually emerging and it is widely used overseas. Blender's importance will increase in Korea in the future!
Q. Can non-majors also take the course?
Yes, you can do it even if you don't major in video or design. The most difficult part of drawing a three-dimensional picture is perspective and angle. In Blender, if you place an object close to or far from the camera, perspective will be created naturally, and if you add light, shadows will be created automatically, so even if you can't draw, you can make it pretty.
Of course, there are exceptions, such as sculpting or texture painting, but the modeling and rendering you learn in this video are basic steps that anyone can do if they follow along diligently and have the will to create!
Q. What do I need to prepare to take this course?
computer
I recommend a desktop computer . For detailed recommended specifications, please check the link below. A laptop is also possible, but rendering work in 3D requires a lot of graphics card performance, and it may be inconvenient because Blender uses the numpad (the number pad to the right of the arrow keys) a lot.
Check your computer specifications for Blender
mouse
I need a mouse with a wheel .
Keyboard
I recommend a keyboard with a numpad .
(Optional) Tablet PC or dual monitor
Since there are many functions and the nature of the videos involves stopping in the middle to follow along, it is useful to have a tablet PC or dual monitors to watch the videos at the same time and follow along.
Q. What should I do if something gets blocked?
If you get stuck in the middle, it becomes difficult to proceed to the next step. We understand your frustration, so we are always open to questions. For inquiries regarding Infraon service operation, please use 1:1 inquiry.
Who is this course right for?
People who know the basic functions of Blender but find it difficult to model
Anyone who wants to create a proper piece in 3D
Need to know before starting?
Blender Basics
Students
4,127
Reviews
116
Rating
4.9
Courses
7
안녕하세요. 코드모드 입니다! :)
블렌더로 3D 애니메이션이나 디오라마 작품 작업도 하고 유튜브에 튜토리얼도 올리고 있어요.
----------------------------------------------------------------------------------------------
- 유튜브 채널 : www.youtube.com/codemod3d
- 인스타그램 : www.instagram.com/codemod (DM확인 잘 안해요!)
따라 만든 작품들을 유튜브나 인스타그램 등 SNS에 올리실 때는
@codemod 또는 #codemod 태그 달아주시기를 부탁드려요!
----------------------------------------------------------------------------------------------
- 개인적인 연락 : codemod3d@gmail.com
- 비즈니스 문의 : codemod.om@gmail.com
All
30 lectures ∙ (14hr 25min)
are provided.
floor
33:49
wall
31:25
stone wall
28:14
rug
17:39
Magic wand
29:39
Potion / Shelf
38:05
box / jar
25:05
character
43:13
Portal
29:10
Texturing 1
52:46
Texturing 2
43:17
Bonus!
03:40