인프런 커뮤니티 질문&답변
답변 4
0
안녕하세요.
다른 방법을 찾아봤습니다.
1. vagrant destroy로 기존 가상서버를 삭제해주세요.
2. 윈도우즈의 파워쉘을 관리자 권한으로 열고 다음을 실행해주세요.
dism.exe /online /Enable-Feature /FeatureName:VirtualMachinePlatform /all /NoRestart
3. 윈도우즈를 재부팅해주세요.
4. 다시 vagrant up
이 방법으로 해보시고 혹시 또 안되시면 구글에서 "vagrant private key timeout" 등으로 검색을 해보시는 것도 좋을 것 같습니다.
실습용 서버구축을 최대한 간편하게 하기 위해서 vagrant script로 만들었기 때문에 다른 방법은 수동으로 만들 수 밖에 없습니다.
virtualbox에 rocky linux로 3대의 서버를 만드시고 vagrant 파일 내용을 참고로 서버를 만들어주시면 가능합니다.
하지만 이 방법은 손이 많이 가고 서버 구축의 경험이 있는 분들만 가능한데다 이 강좌의 범위를 넘어서기 때문에 상세히 설명을 드리기가 어렵습니다.
이번에 설명드린 방법으로 해결이 되었으면 좋겠습니다.
혹시 검색해도 괜찮은 방법이 안나오면 불편하시겠지만 다시한번 질문을 남겨주세요.
0
같은 문제를 재현할 수 없어 검색으로 얻은 답을 대신 드려야 할 것 같습니다.
1. vagrant destroy 로 지금까지 생성했던 실습용 가상서버를 삭제해주세요.
2. Vagrantfile 을 편집기로 여시고 프로바이더를 버철박스로 지정해주는 곳을 찾아 그 아래에 다음과 같이 코드를 추가해주고 저장해주세요.
추가할 곳은 세 군데입니다.
.... 코드 중간 생략
cent1.vm.provider "virtualbox" do |v| <-- 이 부분을 찾으시고
v.customize ['modifyvm', :id, '--cableconnected1', 'on'] <-- 이 부분을 추가해주세요
.... 코드 중간 생략
cent2.vm.provider "virtualbox" do |v| <-- 이 부분을 찾으시고
v.customize ['modifyvm', :id, '--cableconnected1', 'on'] <-- 이 부분을 추가해주세요
.... 코드 중간 생략
cent3.vm.provider "virtualbox" do |v| <-- 이 부분을 찾으시고
v.customize ['modifyvm', :id, '--cableconnected1', 'on'] <-- 이 부분을 추가해주세요
3. vagrant up 을 다시 실행
0
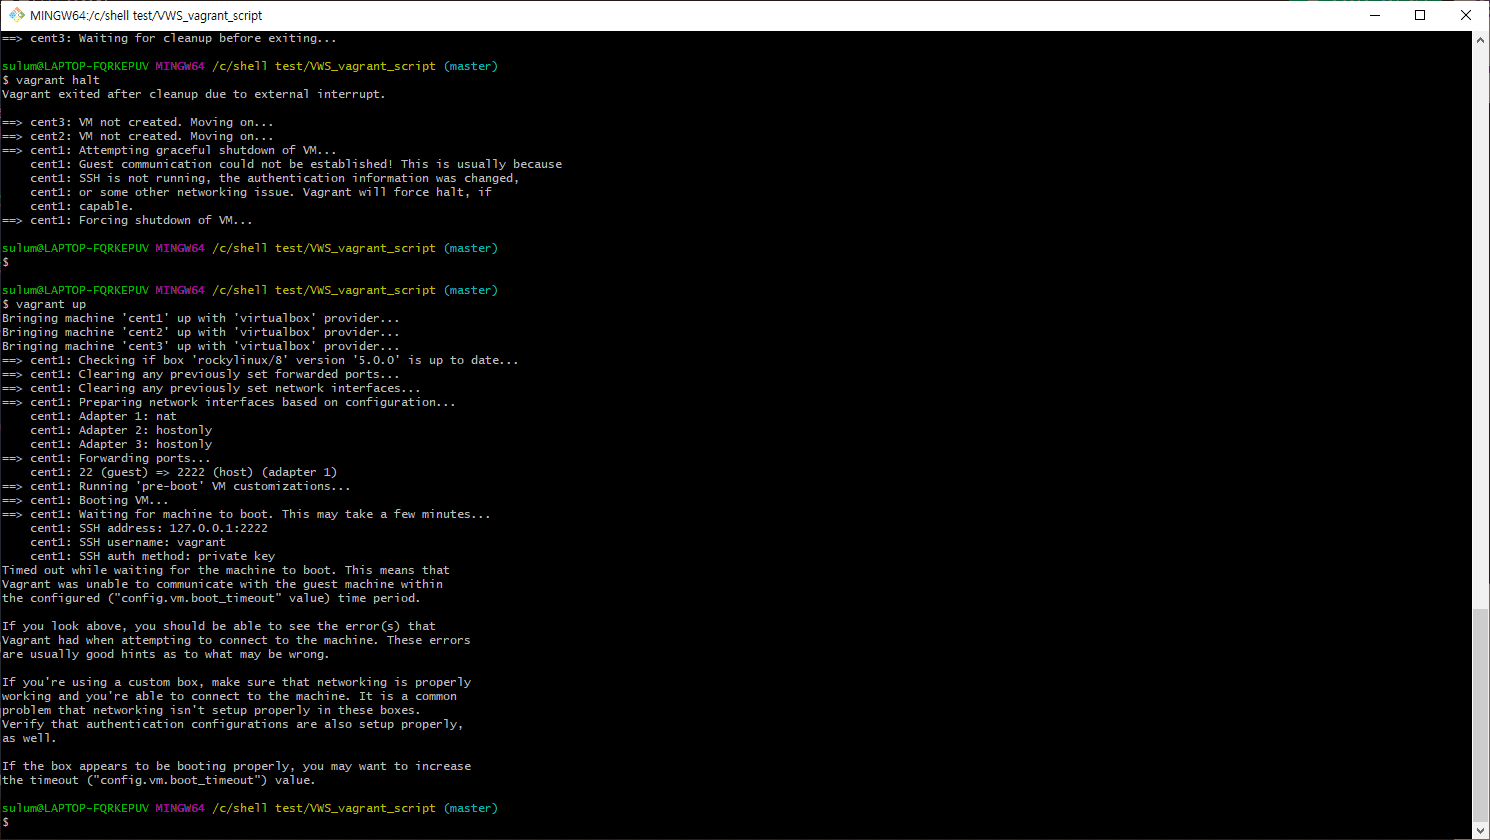
텍스트로 올립니다!!
배울생각에 기대에 부풀어 있었는데 처음부터 쉽지 않네요 ㅠㅠ
sulum@LAPTOP-FQRKEPUV MINGW64 /c/shell test/VWS_vagrant_script (master)
$ vagrant up
Bringing machine 'cent1' up with 'virtualbox' provider...
Bringing machine 'cent2' up with 'virtualbox' provider...
Bringing machine 'cent3' up with 'virtualbox' provider...
==> cent1: Checking if box 'rockylinux/8' version '5.0.0' is up to date...
==> cent1: Resuming suspended VM...
==> cent1: Booting VM...
==> cent1: Waiting for machine to boot. This may take a few minutes...
cent1: SSH address: 127.0.0.1:2222
cent1: SSH username: vagrant
cent1: SSH auth method: private key
Timed out while waiting for the machine to boot. This means that
Vagrant was unable to communicate with the guest machine within
the configured ("config.vm.boot_timeout" value) time period.
If you look above, you should be able to see the error(s) that
Vagrant had when attempting to connect to the machine. These errors
are usually good hints as to what may be wrong.
If you're using a custom box, make sure that networking is properly
working and you're able to connect to the machine. It is a common
problem that networking isn't setup properly in these boxes.
Verify that authentication configurations are also setup properly,
as well.
If the box appears to be booting properly, you may want to increase
the timeout ("config.vm.boot_timeout") value.
같은 문제를 재현할 수 없어 검색으로 얻은 답을 대신 드려야 할 것 같습니다.
1. vagrant destroy 로 지금까지 생성했던 실습용 가상서버를 삭제해주세요.
2. Vagrantfile 을 편집기로 여시고 프로바이더를 버철박스로 지정해주는 곳을 찾아 그 아래에 다음과 같이 코드를 추가해주고 저장해주세요.
추가할 곳은 세 군데입니다.
.... 코드 중간 생략
cent1.vm.provider "virtualbox" do |v| <-- 이 부분을 찾으시고
v.customize ['modifyvm', :id, '--cableconnected1', 'on'] <-- 이 부분을 추가해주세요
.... 코드 중간 생략
cent2.vm.provider "virtualbox" do |v| <-- 이 부분을 찾으시고
v.customize ['modifyvm', :id, '--cableconnected1', 'on'] <-- 이 부분을 추가해주세요
.... 코드 중간 생략
cent3.vm.provider "virtualbox" do |v| <-- 이 부분을 찾으시고
v.customize ['modifyvm', :id, '--cableconnected1', 'on'] <-- 이 부분을 추가해주세요
3. vagrant up 을 다시 실행
0


똑같은 메시지가 나오면서 안되네요 ㅠㅠ 어케해야하죵...
vagrant 말고 다른 방법은 없나요? ㅠ